Color Scheme

Color Schemes are the colors used for the level design in Will You Snail?. There are three color schemes that the player can change to: Classic, the theme before the game received a color update, Modern, the current (and default) color scheme, and Clean, a color scheme with minimal details. These schemes can also be customized by editing a text file
How to Edit Color Schemes
Source: Official Guide
The color schemes are located in <install directory>/Colors. If you don't know how to find that, there is an easy way to do so:
1. Right click on the game in your library and select properties.

2. Click on the local files tab, then on browse.
3. Open the "Colors" folder. You should see one folder for every color scheme in the game:

Adding a new Color Scheme
The best way to create a new color scheme is to duplicate an existing one. That gives you a solid basis to start with. For this guide I decided to duplicate the classic color scheme (folder "2"). Just rename your new folder to "4" (or whatever the next unused number is):

That's it. If you restart the game, you should see your new color scheme in the menu now: Go ahead and select it! For now it should look exactly like the color scheme you copied.
Understanding the Files
Once you open your new color scheme folder you'll find the following things inside: Let's go through the contents one by one.
Six Text Files
There are six different areas in Will You Snail and every area has different colors. The text files are named by their area or chapter names. It's really just simple text files so you can edit these with any text editor you want. Let's have a look what's inside the file "Normal.txt" for example: It's a ton of different color values. If you change these, the corresponding colors in the game are gonna change as well.
Preview.png
This file is used as a preview image in the color selection menu of the game. It needs to have a size of 960x540 pixels and be in png format. Once your new color scheme is done you might wanna update this image to reflect your creation.
The "Overrides" Folder
This folder contains a bunch more text files.

These are formatted and work in the exact same way as the 6 chapter files we looked at above. What's different is:
- The "Overrides" apply only to individual levels. The name of the override file tells you which level it applies to.
- Override files don't need to contain every value for every color. Missing values will automatically be taken from the chapter files.
- The values in override files have higher priority and override the colors specified in the chapter files.
So let's for example say you made the underwater chapter blue, but there is one specific underwater level you'd like to be yellow, you can easily do that by creating an override file for that level here.
Understanding the Syntax
The syntax of the text files might seem a little odd so let me explain how it works. There are three different kinds of values:
Color Values
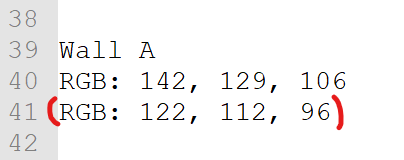
These are the most common ones. The first line is the name of the color (these need to be specific keywords in order to work). The second line are the color values. There are two different ways you can use to define a color value. You can use the prefix "RGB:" to define the colors using their red, green and blue values or you can use the prefix "HSV:" to define the colors using their hue, saturation and value. The numbers for both the RGB as well as the HSV values always need to be whole numbers from 0 to 255 (inclusively). So if you want to make the background red for example, you can either write it like this:

Or like this:

Both work and you can change a RGB into an HSV value and vice versa at any time if you want.
Number Values
There is a keyword in the first line. In the second line there is just one simple number. This number can be any positive or negative number e.g. 2, -2, 10.5, -0.12, 5999

Obviously not every number makes sense for every value so you'll have to experiment a bit to see what works.
Vector Values
These work like number values but the difference is that the keyword is followed by three numbers instead of just one:

Usually these three values stand for the red, green, and blue channel. What's different compared to color values is that the numbers can be anything you want and don't have to stick to a limited range of whole numbers.
How the Algorithm Reads Values
I think it's very useful to know how the algorithm that reads these color files works because it has some important implications.
- Color files are read into memory whenever you enter a level.
- Implication: You need to exit and enter the level or use a different way to force a reload to see your changes in game.
- There are "invisible" default values for everything.
- Implication: When a certain keyword is not in the color file, the default value will be used.
- The files are read from top to bottom.
- Implication: If a key-value pair appears in the file multiple times, the last one overrides the others.
- If a line doesn't contain a know keyword, the algorithm skips it.
- Implication: You can put empty lines, comments, filler lines, whatever you want in the files. You can also reorder key-value pairs any way you want.
- After a know keyword, only the next line (for vectors: three lines) will be read.
- Implication: You can try out new values without deleting your previous ones. In this example here the third line is simply ignored by the algorithm:
- Override files are read as if they were extensions at the end of the chapter files.
- Implications: You can use override files to override any value you want for specific levels.

Gallery

- Pages with incomplete galleries
- Pages with missing information